Microsoft Graph — Send Mail API
Content
Abstract
In this tutorial, I will show a step-by-step procedure to employ Microsoft Graph API to authenticate and send mails from Microsoft Outlook (Enterprise Edition) with OAuth2 authentication mechanism. This article is organized as follows:
- Create a new application on Microsoft Azure to obtain Application-ID and Client-ID for later use.
- Implement a Flask application to authenticate users based on Microsoft Azure Active Directory, and then send mails on their behalf.
TL;DR
If you just want to run the demo program, please visit this GitHub repository to clone the sample program: https://github.com/duonghuuphuc/msgraph-sendmail-python.
1. Prerequisite
To complete this tutorial, you will need to have the following things:
- A Microsoft 365 account with an active subscription such as Home or Business plan.
- If you are trying this tutorial within an organization that subscribes to Microsoft 365 Business plan, you also need to have an Administrator account in order to grant permissions on the created application.
- You should have a background in Python programming language to understand the sample Flask project.
3. Create a new application on Microsoft Azure
In this section, I will show you how to create an application on Microsoft Azure. First, you sign in to Microsoft Azure with either your personal account (Skype, Xbox, Live, and Hotmail) or work account (Microsoft 365 Business Plan). Then, you perform the following steps:
- Navigate to the Microsoft identity platform for developers App registrations page.
- Select New registration, as shown in Fig. 1.
-
As shown in Fig. 2, you need to (1) enter the application's name that will be displayed in the login screen, (2) select the supported account types, and (3) enter the redirect URI. There are four types of supported accounts, as follows:
- The Accounts in this organizational directory only means that you're building an application for use only by users (or guests) in your tenant.
- The Accounts in any organizational directory means that you want users in any Azure Active Directory (Azure AD) tenant to be able to use your application. This type of app is known as a multi-tenant application in the Microsoft identity platform.
- The Accounts in any organizational directory and personal Microsoft accounts means that the application targets the widest set of customers, including users who have personal Microsoft accounts.
- Select Personal Microsoft accounts if you're building an application only for users who have personal Microsoft accounts such as Skype, Xbox, Live, and Hotmail accounts.
- Select Register to complete the initial app registration.
- When registration finishes, the Azure portal displays the app registration's Overview pane, as shown in Fig. 3. You see the Application (client) ID which is also called the client ID, this value uniquely identifies your application in the Microsoft identity platform.


4. Add credentials
Credentials are used by confidential client applications that access a web API. In this example, we will add client secrets (a string) as credentials to our confidential client app registration.
- Select Certificates & secrets in the left navigation bar, then select New client secret, as shown in Fig. 4.
- As shown in Fig. 5, you need to enter the Description and select its lifetime, then select the Add button.
- After submitting the information of the client secret, the Azure portal will display the Value of the created client secret. You must record this secret's value for use in your client application code, since this value is never displayed again after you leave this page.


5. Grant API permissions
In this section, we will add the corresponding API permissions to our application. By default, the User.Read.All has been already added to the application. In this example, we will add more API permissions to allow our application to be able to send mails on the behalf of users.
The Microsoft identity platform supports two types of permissions, i.e., (a) delegated permissions and (b) application permissions.
- Delegated permissions are used by apps that have a signed-in user present. For these apps, either the user or an administrator consents to the permissions that the app requests. The app is delegated with the permission to act as a signed-in user when it makes calls to the target resource.
- Application permissions are used by apps that run without a signed-in user present, for example, apps that run as background services or daemons. Only an administrator can consent to application permissions.
In this example, we will add the following API permissions, the result is as shown in Fig. 6:
Mail.Send(Delegated)Mail.Send(Application) [Require an administrator to consent this permission]User.Read(Delegated)User.Read.All(Application) [Require an administrator to consent this permission]User.ReadBasic.All(Delegated)

6. Demo program
In this section, I will present how to implement a Flask application (client program) that authenticates users and sends mails on the behalf of authenticated users. You need to perform the following step to run the demo program:
- Clone the demo program from https://github.com/duonghuuphuc/msgraph-sendmail-python.
- Before executing the program, you should create a new Python virtual environment in order to avoid this program affecting your current working environment.
- Configure the source code to include the credential information of the created application on Microsoft Azure.
- ⚡ Run the demo program.
7. Configure & run the demo program
For ease of executing the demo program, I have prepared an env.sh file that contains a list of commands that run sequentially to start the demo Flask application. There are two parameters that you must configure before running the demo program, i.e., CLIENT_ID and CLIENT_SECRET. The CLIENT_ID is a string that you did obtain as presented in Section 3. And the CLIENT_SECRET is the recorded secret's value, as presented in Section 4.
After inserting the CLIENT_ID and CLIENT_SECRET into the env.sh file, you can now run the demo program by executing the following commands in Terminal window:
work <env_name>pip install requirements.txtsource env.sh
You should notice that the second command is a one-time executed command. The first and third commands will be manually executed each time you run the demo program. Fig. 7 shows the result when visiting the http://localhost:5000 in a web browser.

The demo program allows you to sign in with both a personal account (Skype, Xbox, Live, and Hotmail) and a work account (Microsoft 365 Business plan). In Fig. 8, I demonstrate the demo program with a personal account.
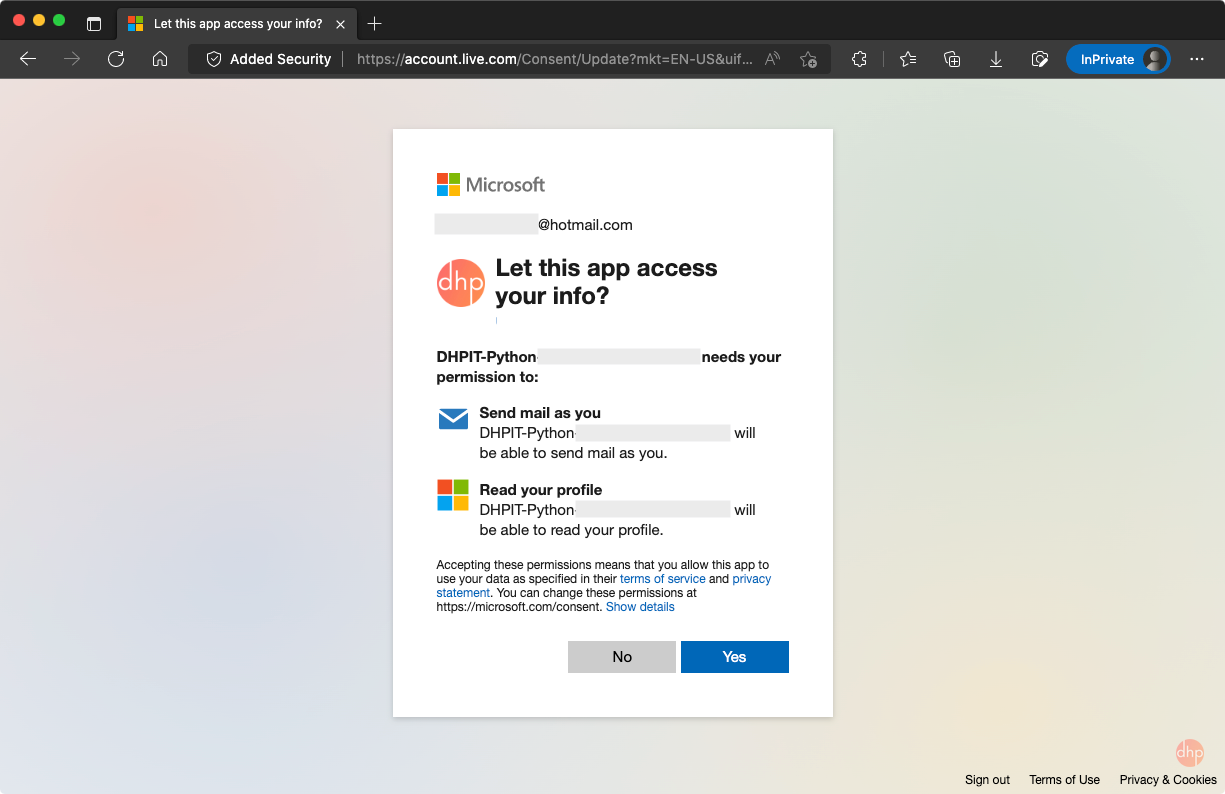
After users click on the Yes button, they will be redirected to the demo application that will render a list of available functionalities, as shown in Fig. 9, since the users have been authenticated.
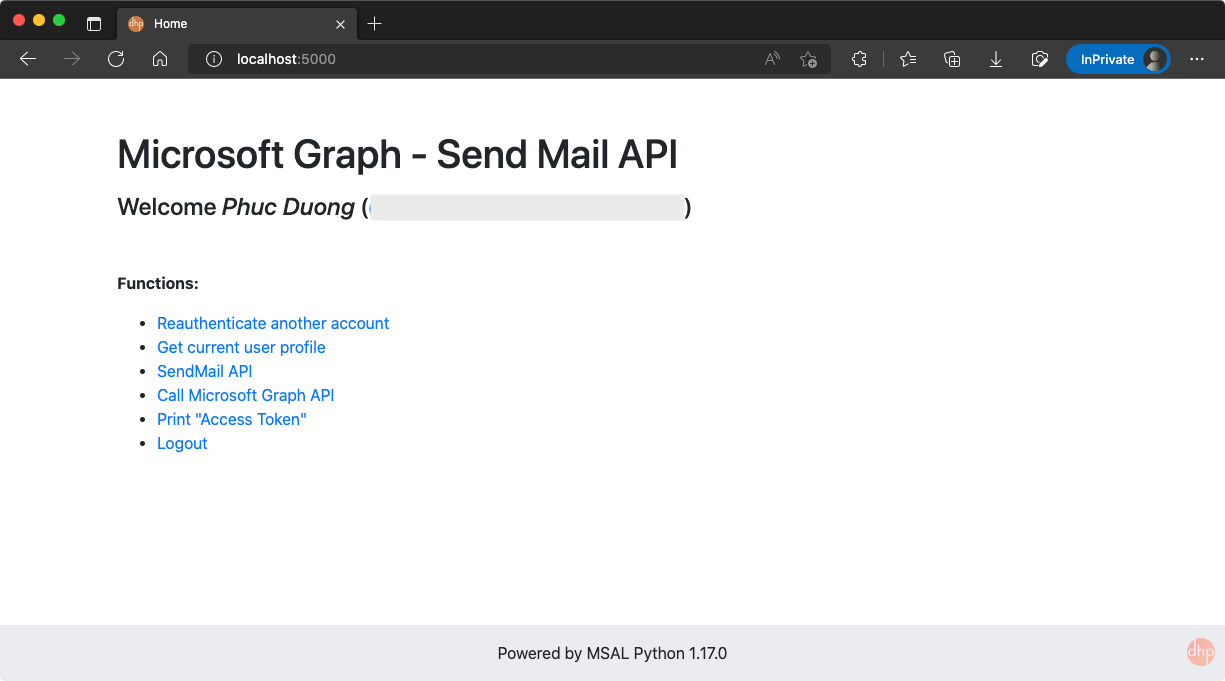
Fig. 10 shows the web page that demonstrates the send mail functionality which includes three textboxes, i.e., recipient email, subject and content. You can enter your email address to test this functionality.

8. Conclusion
In this article, I have presented the procedure to authorize a client program that sends emails on behalf of users that have either a personal Microsoft account or a business one. The procedure consists of four main steps, i.e., (1) create an application on Microsoft Azure, (2) issue credentials, (3) add API permissions to the application, and (4) run the demo program.